Git is a useful tool for version control, but some features can be confusing at first—especially the concept of an upstream branch. If you've ever seen a message asking you to set one after pushing code, don't worry—it's common. An upstream branch connects your local branch to a remote one, so Git knows where to send or pull changes without needing extra input each time. This saves time and avoids errors. In this guide, you'll learn what an upstream branch is, why it's important, and how to set it up clearly and simply.
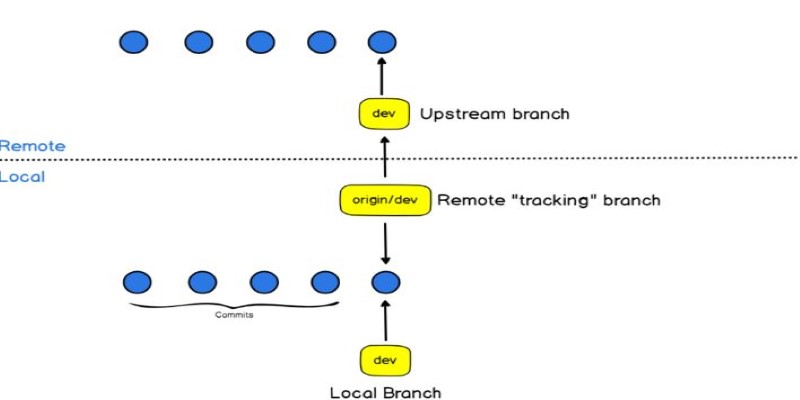
To get started, it helps to define what we mean by "upstream" in the context of Git. In simple terms, the upstream branch is just the remote branch; your local branch is remote-tracking. Imagine you're making a default target for your updates. If you're working on some feature locally, you probably want to push your changes to a related branch on the remote repo, which is the default origin.
When you clone a repository and start working on the default branch, Git usually sets the upstream branch for you. But when you create new branches locally, Git doesn’t automatically know which remote branch it should track. That’s where setting the upstream comes in. Without this step, Git can’t figure out where your code should go unless you specify it manually every time.
The advantage of connecting your branch to an upstream is apparent. You avoid typing errors and get your local and remote branches coordinated without any confusion. After having the upstream set, commands like git push and git pull always know what they are doing without additional instructions.
There are a couple of ways to set up an upstream branch, and the method you use will depend on your current situation. If you're pushing a local branch to the remote for the first time, the most common approach is to include the --set-upstream or -u flag with your push command. This tells Git not only to push the changes but also to remember the link between your local and remote branches.
Here’s how the command typically looks:
git push --set-upstream origin your-branch-name
This does two things: it pushes your local branch to the origin remote and links it to the remote branch with the same name. After this, future git push or git pull commands will work without needing to specify the origin of your branch name again.
You can also set the upstream branch manually if it wasn’t set during the initial push. Use this command:
git branch --set-upstream-to=origin/your-branch-name
This method is useful if the remote branch already exists and you want your local branch to track it without doing a push.
Another helpful command is:
git push -u origin your-branch-name
The -u is a shortcut for --set-upstream. It’s cleaner and more common in everyday use. Whether you use --set-upstream or -u, the result is the same—Git knows which remote branch your local branch should track.
Once you’ve set the upstream branch, you might want to check if it’s set correctly. Git makes this easy. You can run:
git status
This will show a message that includes something like: "Your branch is up to date with 'origin/your-branch-name.'" That line confirms the upstream is properly configured.
To see more details, you can use:
git branch -vv
This command gives you a list of all local branches, their tracking status, and whether they’re ahead or behind their upstream counterparts.
In some cases, you may want to change the upstream branch to point to something else. For instance, you might have renamed a branch or switched remotes. To update the upstream, run the following:
git branch --set-upstream-to=origin/new-branch-name
This updates the link, and your local branch will now track the new remote branch instead.
If you want to remove the upstream link altogether, you can use:
git branch --unset-upstream
This clears the tracking connection, which can be useful if the remote branch is deleted or renamed and you're starting fresh.
Understanding how to set the upstream branch becomes even more important when you're working with teams. Imagine multiple developers pushing to the same repository. If you forget to set your upstream and use a generic git push, Git may not know where to send your changes, or it may push to an unintended location. Setting the upstream helps eliminate this ambiguity and keeps everyone’s work flowing to the right place.
When creating feature branches or hotfix branches, always remember to set the upstream during the first push. This keeps things organized and makes it easier for your collaborators to pull your updates without confusion.
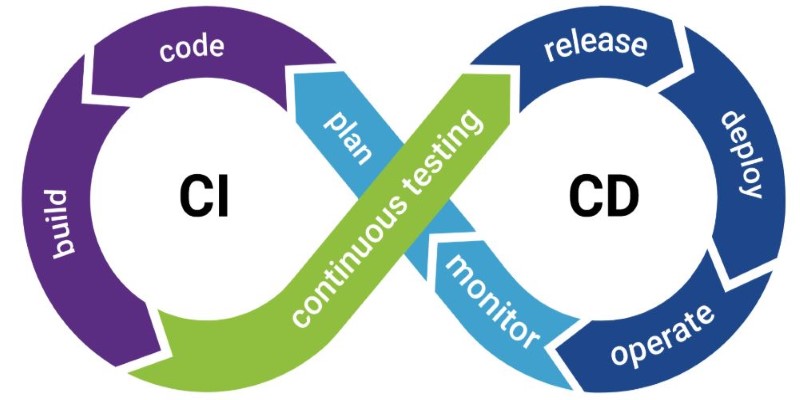
In CI/CD pipelines, where Git commands are often scripted, having upstream branches properly set helps ensure that your automation tools work without needing excessive configuration or manual input.
Also, keep in mind that if you delete a remote branch and later create a new one with the same name, you might need to re-establish the upstream connection. Git won't automatically re-link unless you tell it to.
Setting an upstream branch in Git is a simple yet important step for smooth collaboration and code management. It connects your local branch with a remote one, making future pushes and pulls easier and less error prone. By establishing this link, Git knows where to send or fetch changes without needing extra input from you each time. Whether you're working solo or in a team, setting the upstream branch saves time and avoids confusion. Once you get the hang of it, this small practice becomes a natural part of your workflow and helps keep your project organized and efficient.

Discover these 7 AI powered grammar checkers that can help you avoid unnecessary mistakes in your writing.

YouTube channels to learn SQL, The Net Ninja, The SQL Guy

Explore the most popular AI programming languages used in artificial intelligence projects. Learn why Python, R, and Julia are leading choices for developers worldwide

Discover how hospital IoT, wearable health trackers, and AI‑powered patient monitoring improve healthcare services today

Master how to use DALL-E 3 API for image generation with this detailed guide. Learn how to set up, prompt, and integrate OpenAI’s DALL-E 3 into your creative projects
Every aspect of OpenAI's GPT-4.5, which presents better conversational performance alongside improved emotional awareness abilities and enhanced programming support and content creation features

AI in drug discovery is transforming medical research by speeding up drug development, reducing costs, and enabling personalized treatments for patients worldwide

How search algorithms in AI—like BFS, DFS, and A*—solve real-world problems with smart, structured logic. Simple, practical, and human-written insights

Want to run AI without the cloud? Learn how to run LLM models locally with Ollama—an easy, fast, and private solution for deploying language models directly on your machine

AI in Supply Chain Optimization helps businesses improve efficiency, reduce costs, and manage risks with smart technology and real-time solutions

Discover how OpenAI’s o1-preview and o1-mini models advance reasoning, efficiency, and safety on the path to AGI.

Discover how autonomous robots can boost enterprise efficiency through logistics, automation, and smart workplace solutions